Fuji Workflow
Introduction
Fuji is the Avalanche network's test network. You can use it to test your dapp or smart contract after you've developed it locally. (You can use Avalanche Network Runner to test things locally.) Fuji is typically on the same version as the Avalanche Mainnet, but sometimes it is running an unreleased version of AvalancheGo. In general, you can expect Fuji's behavior to be about the same as Avalanche Mainnet. Tools such as a explorers and wallets should work with the Fuji Testnet.
In this tutorial, we’ll go through an example Fuji workflow to show how it can be used. We'll do the following:
- Set up Fuji network on Core (optional)
- Generate a 24 word english mnemonic via AvalancheJS
- Derive external C-Chain addresses via AvalancheJS
- Get AVAX from the Fuji faucet
- Send AVAX via ethersJS
- Examine the resulting transaction on the Avalanche Explorer
- Use a private key derived from a mnemonic to sign into the Core extension (wallet)
Set up Fuji Network on Core (optional)
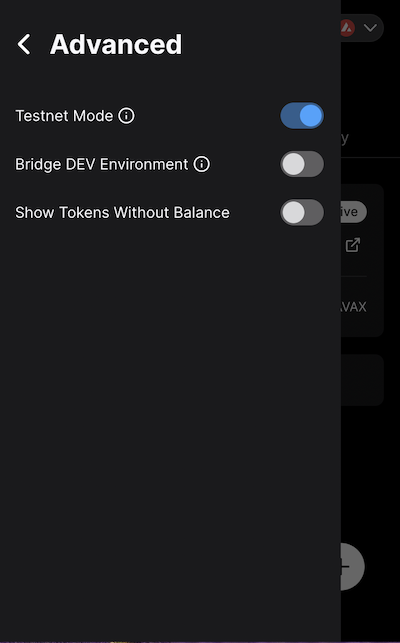
To access the Fuji test network, Testnet Mode needs to be enabled. In order to do that, go to Settings and click on Advanced.

Here, turn on the Testnet Mode feature. This will automatically make Core switch to Fuji Testnet.
If you are using other wallets, like MetaMask, you can add the Fuji Testnet using the following specs:
- Network Name: Avalanche C-Chain
- New RPC URL: https://api.avax-test.network/ext/bc/C/rpc
- ChainID:
43113 - Symbol: AVAX
- Explorer:
https://testnet.snowtrace.io
Generate a Mnemonic
To begin, we'll create a mnemonic phrase with AvalancheJS. Mnemonics enable us to encode strong security into a human-readable phrase. AvalancheJS supports 10 languages including English, Japanese, Spanish, Italian, French, Korean, Czech, Portuguese, Chinese Simplified and Chinese Traditional.
First, generate a 24 word english BIP39-compliant mnemonic via AvalancheJS.
import { Mnemonic } from "avalanche";
const mnemonic: Mnemonic = Mnemonic.getInstance();
const strength: number = 256;
const wordlist = mnemonic.getWordlists("english") as string[];
const m: string = mnemonic.generateMnemonic(strength, randomBytes, wordlist);
console.log(m);
// "chimney asset heavy ecology accuse window gold weekend annual oil emerge alley retreat rabbit seed advance define off amused board quick wealth peasant disorder"
Derive Addresses
After generating a mnemonic we can use AvalancheJS to derive BIP32-compliant hierarchical deterministic (HD) Keypairs.
import HDNode from "avalanche/dist/utils/hdnode";
import { Avalanche, Mnemonic, Buffer } from "avalanche";
import { EVMAPI, KeyChain } from "avalanche/dist/apis/evm";
import { ethers } from "ethers";

const ip: string = "api.avax-test.network";
const port: number = 443;
const protocol: string = "https";
const networkID: number = 5;
const avalanche: Avalanche = new Avalanche(ip, port, protocol, networkID);
const cchain: EVMAPI = avalanche.CChain();

const mnemonic: Mnemonic = Mnemonic.getInstance();
const m: string =
  "chimney asset heavy ecology accuse window gold weekend annual oil emerge alley retreat rabbit seed advance define off amused board quick wealth peasant disorder";
const seed: Buffer = mnemonic.mnemonicToSeedSync(m);
const hdnode: HDNode = new HDNode(seed);

const keyChain: KeyChain = cchain.newKeyChain();

const cAddresses: string[] = [];

for (let i: number = 0; i <= 2; i++) {
  const child: HDNode = hdnode.derive(`m/44'/60'/0'/0/${i}`);
  keyChain.importKey(child.privateKey);
  const cchainAddress = ethers.utils.computeAddress(child.privateKey);
  cAddresses.push(cchainAddress);
}
console.log(cAddresses);
// [
//   '0x2d1d87fF3Ea2ba6E0576bCA4310fC057972F2559',
//   '0x25d83F090D842c1b4645c1EFA46B15093d4CaC7C',
//   '0xa14dFb7d8593c44a47A07298eCEA774557036ff3'
// ]
Generate Private Keys from a Mnemonic
As long as you have the mnemonic phrase, you can re-generate your private keys and the addresses they control.
For example, if you want to generate the private keys for the first 3 address in the C Chain keychain:
- 0x2d1d87fF3Ea2ba6E0576bCA4310fC057972F2559
- 0x25d83F090D842c1b4645c1EFA46B15093d4CaC7C
- 0xa14dFb7d8593c44a47A07298eCEA774557036ff3
you might update the example script above to the following:
const cAddresses: string[] = [];
const privateKeys: string[] = [];
for (let i: number = 0; i <= 2; i++) {
// Deriving the _i_th external BIP44 C-Chain address
const child: HDNode = hdnode.derive(`m/44'/60'/0'/0/${i}`);
keyChain.importKey(child.privateKey);
// Converting the BIP44 addresses to hexadecimal addresses
const cchainAddress = ethers.utils.computeAddress(child.privateKey);
privateKeys.push(child.privateKey.toString("hex"));
cAddresses.push(cchainAddress);
}
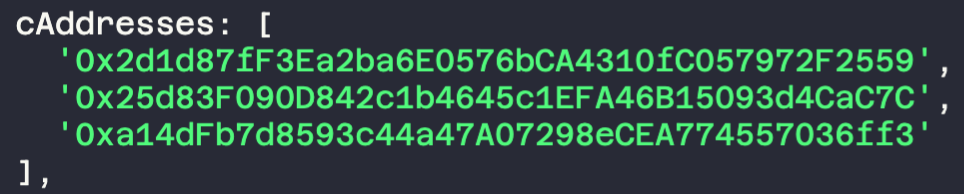
console.log({ cAddresses, privateKeys });
// {
// cAddresses: [
// '0x2d1d87fF3Ea2ba6E0576bCA4310fC057972F2559',
// '0x25d83F090D842c1b4645c1EFA46B15093d4CaC7C',
// '0xa14dFb7d8593c44a47A07298eCEA774557036ff3'
// ],
// privateKeys: [
// 'cd30aef1af167238c627593537e162ecf5aad1d4ab4ea98ed2f96ad4e47006dc',
// 'b85479b26bc8fbada4737e90ab2133204f2fa2a9ea33c1e0de4452cbf8fa3be4',
// 'c72e18ea0f9aa5457396e3bf810e9de8df0177c8e4e5bf83a85f871512d645a9'
// ]
// }
Get a Drip from the Fuji Faucet
We can get a "drip" of AVAX from the Fuji faucet. If you already have an AVAX balance greater than zero on Mainnet, paste your C-Chain address there, and request test tokens. Otherwise, please request a faucet coupon on Guild. Admins and mods on the official Discord can provide testnet AVAX if developers are unable to obtain it from the other two options. These AVAX are for the Fuji Testnet and have no monetary value.
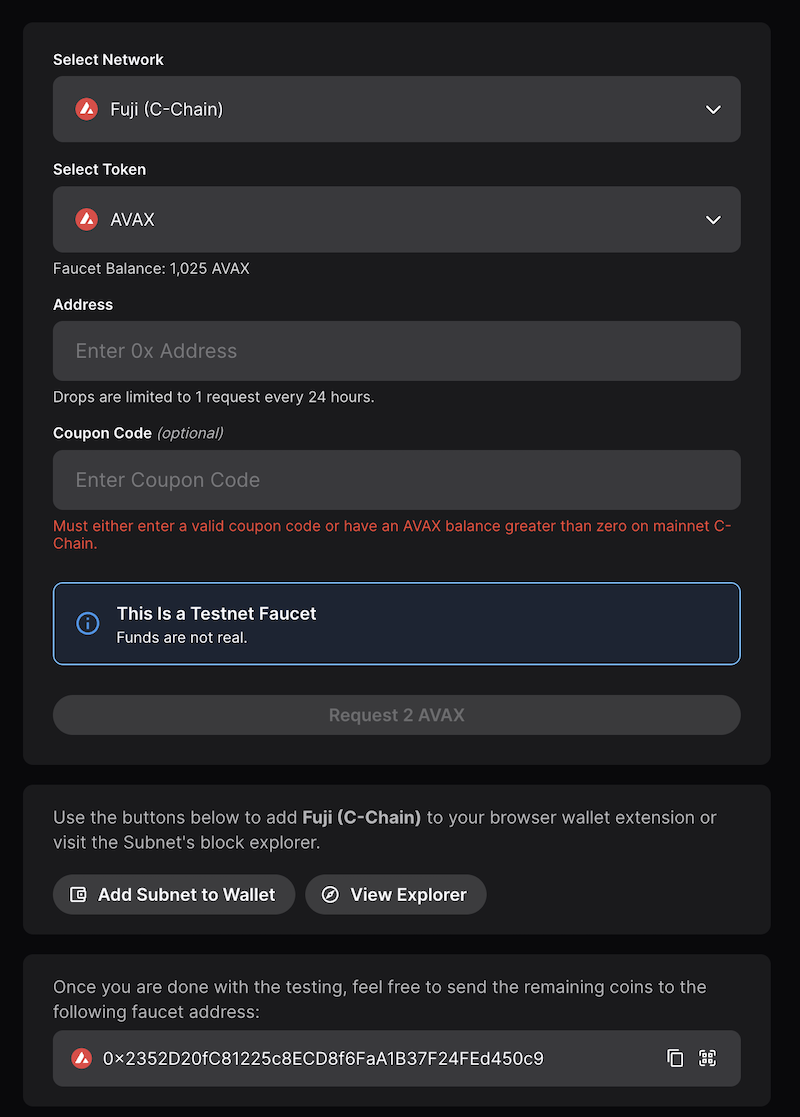
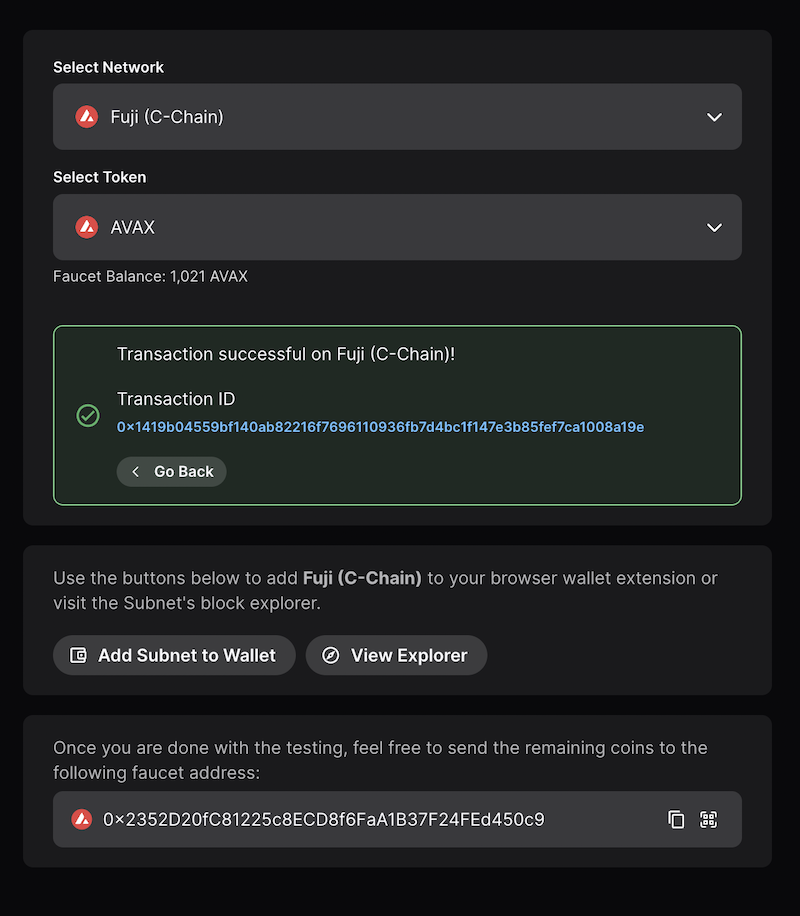
The faucet will send some AVAX to the address and return a transaction ID (txID). This txID can be used with the Fuji Testnet Explorer to learn more about the transaction.
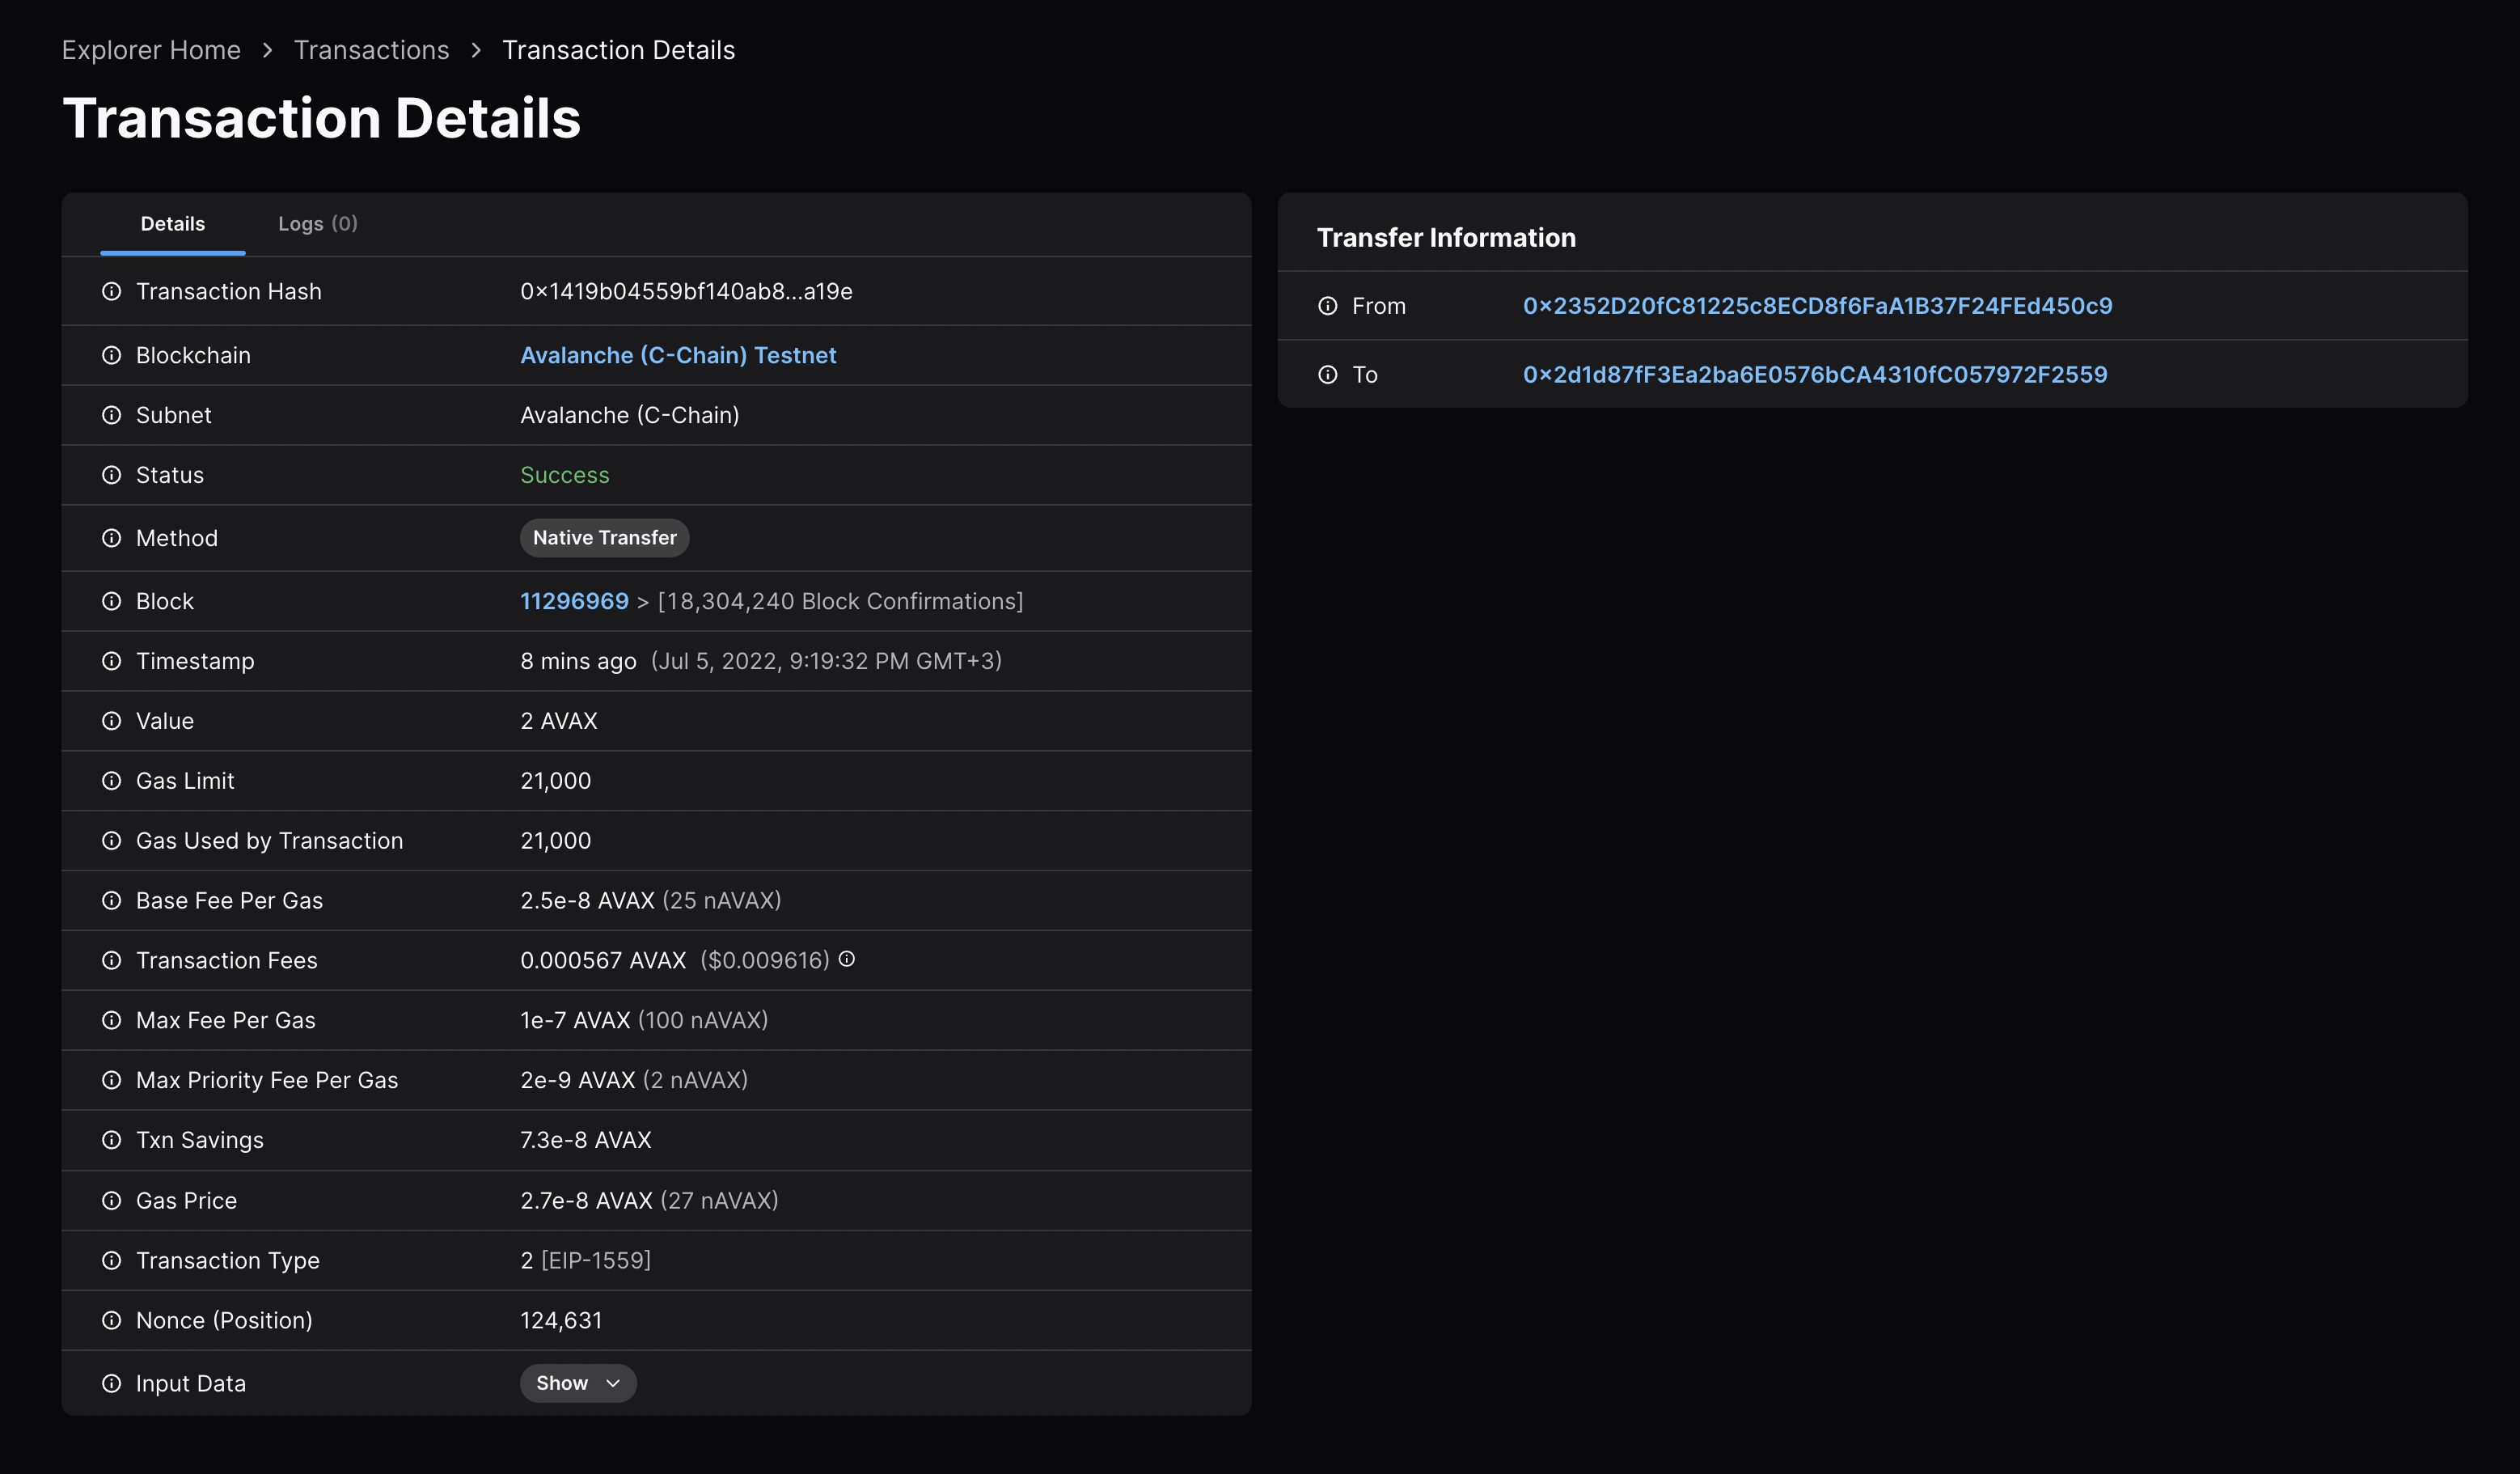
Check the Transaction Details
The txID, 0x1419b04559bf140ab82216f7696110936fb7d4bc1f147e3b85fef7ca1008a19e,
can be seen on the Fuji Testnet
Explorer.
Avalanche also has a Mainnet Explorer.
Get the Balance
We can also use the Fuji Explorer to get the balance for the 1st address—0x2d1d87fF3Ea2ba6E0576bCA4310fC057972F2559.
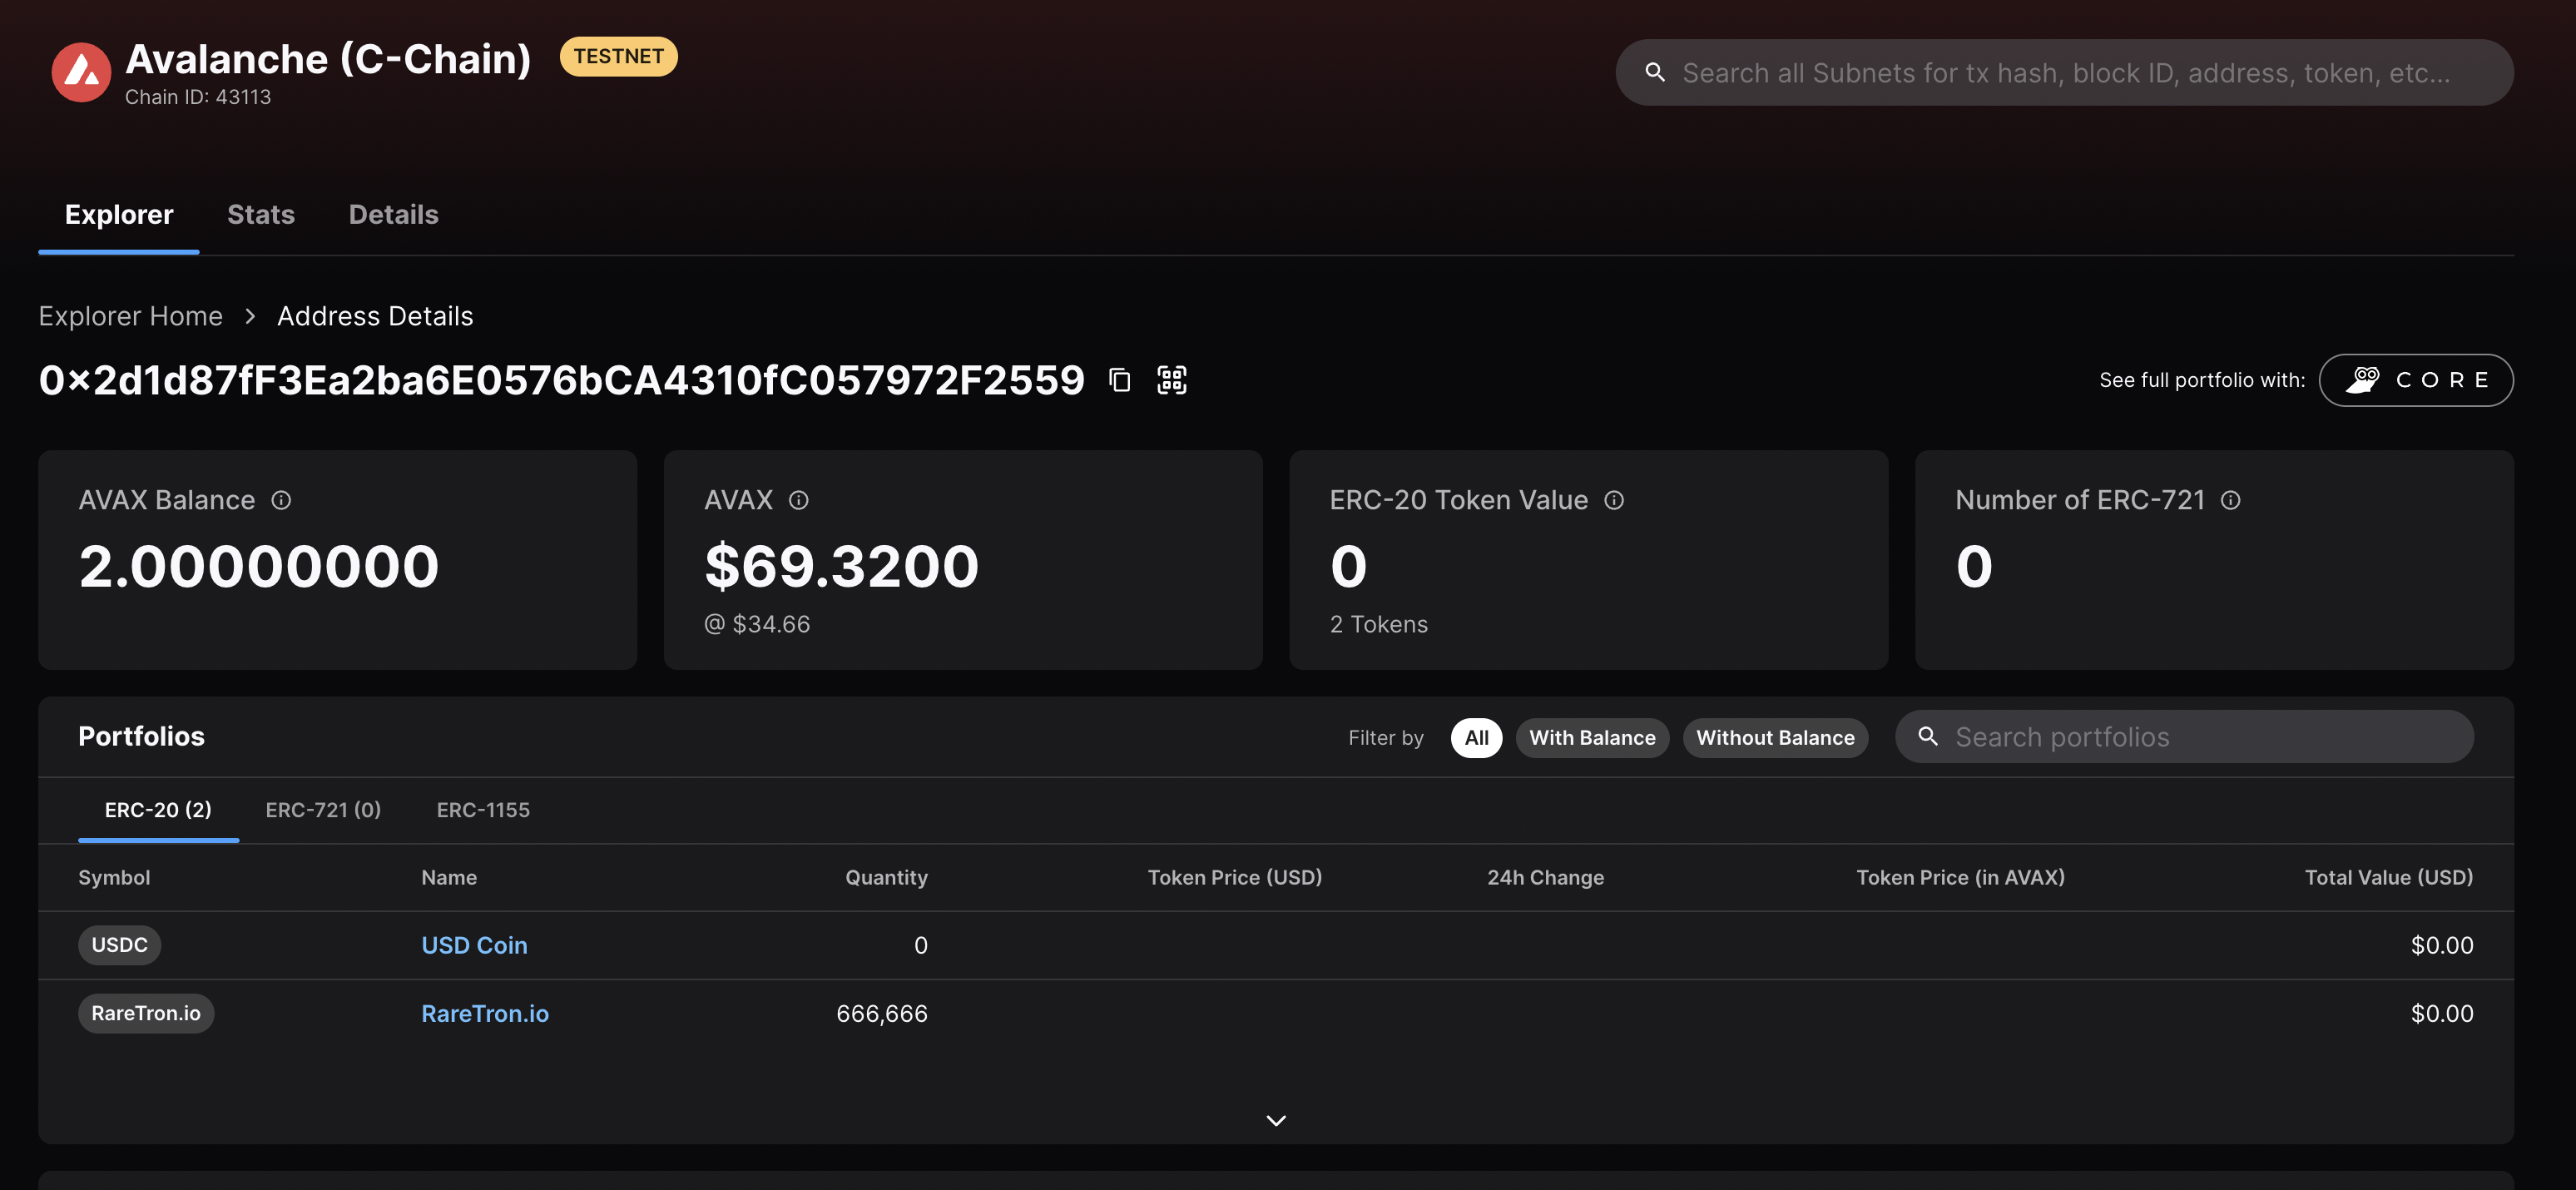
Alternatively, we can use ethersJS to get the balance.
const ethers = require("ethers");
const network = "https://api.avax-test.network/ext/bc/C/rpc";
const provider = ethers.getDefaultProvider(network);
const address = "0x2d1d87fF3Ea2ba6E0576bCA4310fC057972F2559";

const main = async (): Promise<any> => {
  provider.getBalance(address).then((balance) => {
    // convert a currency unit from wei to ether
    const balanceInAvax = ethers.utils.formatEther(balance);
    console.log(`balance: ${balanceInAvax} AVAX`);
    // balance: 2 AVAX
  });
};

main();
Sending AVAX
The faucet sent 2 AVAX to the first address we generated. Let's send AVAX from the 1st address to the 2nd address.
// import ethers.js
import { ethers } from "ethers";
// network: using the Fuji testnet
const network = "https://api.avax-test.network/ext/bc/C/rpc";
// provider: establish and RPC connection to the network
const provider = new ethers.providers.JsonRpcProvider(network);

// Sender private key:
// corresponding address 0x0x2d1d87fF3Ea2ba6E0576bCA4310fC057972F2559
let privateKey =
  "cd30aef1af167238c627593537e162ecf5aad1d4ab4ea98ed2f96ad4e47006dc";
// Create a wallet instance
let wallet = new ethers.Wallet(privateKey, provider);
// Receiver Address
let receiverAddress = "0x25d83F090D842c1b4645c1EFA46B15093d4CaC7C";
// AVAX amount to send
let amountInAvax = "0.01";
// Create a transaction object
let tx = {
  to: receiverAddress,
  // Convert currency unit from ether to wei
  value: ethers.utils.parseEther(amountInAvax),
};
// Send a transaction
wallet.sendTransaction(tx).then((txObj) => {
  console.log(`"tx, https://testnet.snowtrace.io/tx/${txObj.hash}`);
  // A transaction result can be checked in a snowtrace with a transaction link which can be obtained here.
});
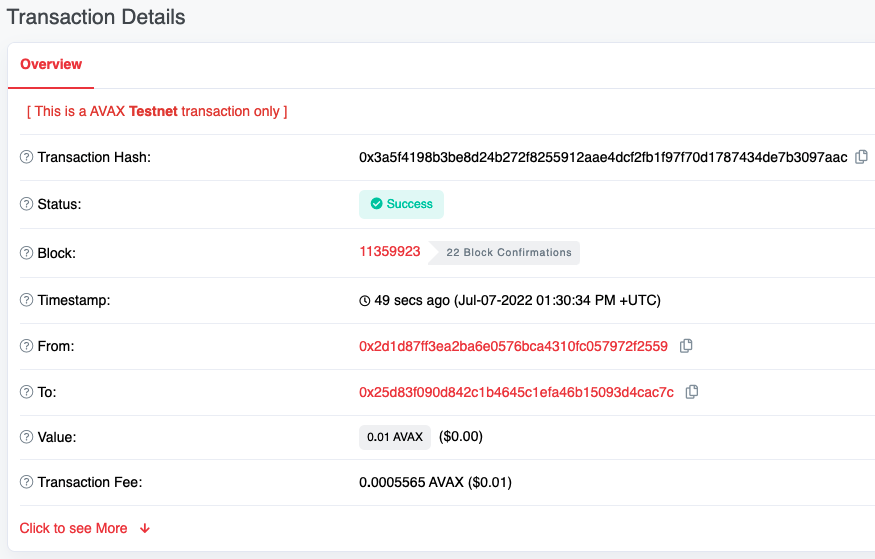
Verify Success
We can verify that the transaction,
0x3a5f4198b3be8d24b272f8255912aae4dcf2fb1f97f70d1787434de7b3097aac, was
successful using the Fuji Testnet Explorer. The transaction can be seen
here.
Get the Balance
We can also use the Fuji Explorer to get the balance for the 2nd address—0x25d83F090D842c1b4645c1EFA46B15093d4CaC7C.
Alternatively, we can use ethersJS to get the balance.
const ethers = require("ethers");
const network = "https://api.avax-test.network/ext/bc/C/rpc";
const provider = ethers.getDefaultProvider(network);
const address = "0x25d83F090D842c1b4645c1EFA46B15093d4CaC7C";

const main = async (): Promise<any> => {
  provider.getBalance(address).then((balance) => {
    // convert a currency unit from wei to ether
    const balanceInAvax = ethers.utils.formatEther(balance);
    console.log(`balance: ${balanceInAvax} AVAX`);
    // balance: 0.02 AVAX
  });
};

main();
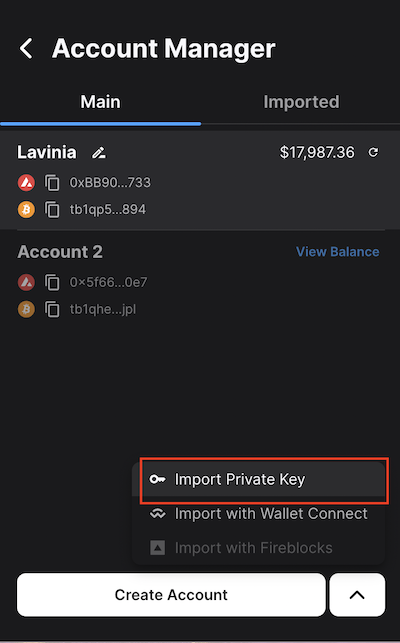
Sign in to Core Extension
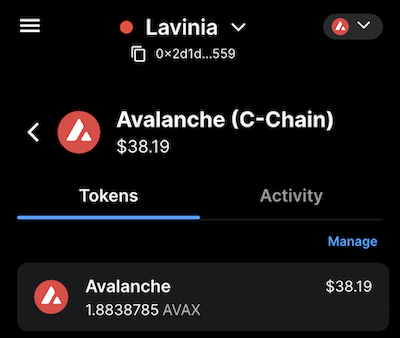
Lastly, we can use the mnemonic to generate a private key to access that account in Core extension. We'll see that it has the AVAX balance and that it derives the hexadecimal address from the private key.
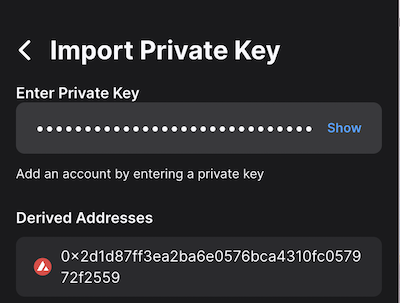
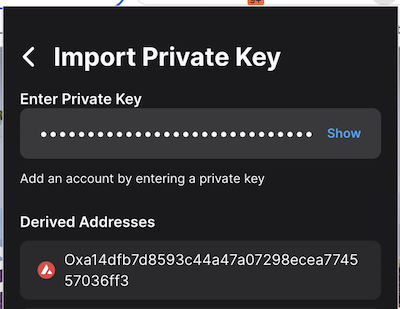
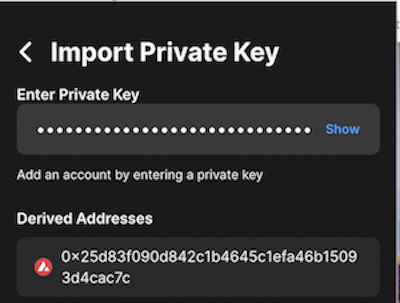
Use the private key to access the account in Core Extension.
The balance is correct and the address is the 1st derived address.
We can repeat this login process using the private keys from the remaining 2 addresses in the script above.
Summary
The Fuji Testnet plays a critical role in testing dapps, smart contracts and financial products before deploying to the Mainnet. Tooling like AvalancheJS, the public API, faucet, and explorer helps to ensure that your testing and QA environment is close to Mainnet so that you can be confident when you launch on Mainnet.
Resources
For additional and valuable resources please see below.
Faucet
The Fuji Faucet sends AVAX to X-Chain or C-Chain addresses to help you test. (This testnet AVAX has no value.)
Wallet
Core extension and Core mobile are simple, secure, non-custodial wallets for storing Avalanche assets. They support Mainnet, Fuji and custom networks.
Explorer
The Avalanche Explorer allows you to explore the network on Mainnet and Fuji.
RPC Endpoints - Public API Server
See here.
AvalancheJS Examples
There are over 60 example AvalancheJS scripts which demonstrate how to assets and NFTs, send transactions, add validators and more.
Was this page helpful?