Run an Avalanche Validator on GCP with One Avalanche-CLI Command
This page demonstrates how to deploy Avalanche validators on GCP using just one Avalanche-CLI command.
Currently, only Fuji network and Devnets are supported.
ALPHA WARNING: This command is currently in experimental mode. Proceed at your own risk.
Prerequisites
Before we begin, you will need to:
- Create a GCP account here and create a new project
- Enable Compute Engine API here
- Download the key json for the automatically created service account as shown here
Create Validator
To create Avalanche validators, run:
avalanche node create <clusterName>
The created nodes will be part of cluster clusterName and all avalanche node commands applied to
cluster clusterName will apply to all nodes in the cluster.
Please note that running a validator on GCP will incur costs.
Ava Labs is not responsible for the cost incurred from running an Avalanche validator on cloud services via Avalanche-CLI.
Currently, we have set the following specs of the GCP cloud server to a fixed value, but we plan to enable customization in the near future:
- OS Image:
Ubuntu 20.04 LTS - Storage:
1 TB
Instance type can be specified via --node-type parameter or via interactive menu. e2-standard-8 is default(recommended) instance size.
The command will ask which region you want to set up your cloud server in:
Which Google Region do you want to set up your node(s) in?:
  ▸ us-east1
    us-central1
    us-west1
    Choose custom Google Region (list of Google Regions available at https://cloud.google.com/compute/docs/regions-zones/)
The command will next ask whether you want to set up monitoring for your nodes.
  Do you want to set up a separate instance to host monitoring? (This enables you to monitor all your set up instances in one dashboard):
  ▸ Yes
    No
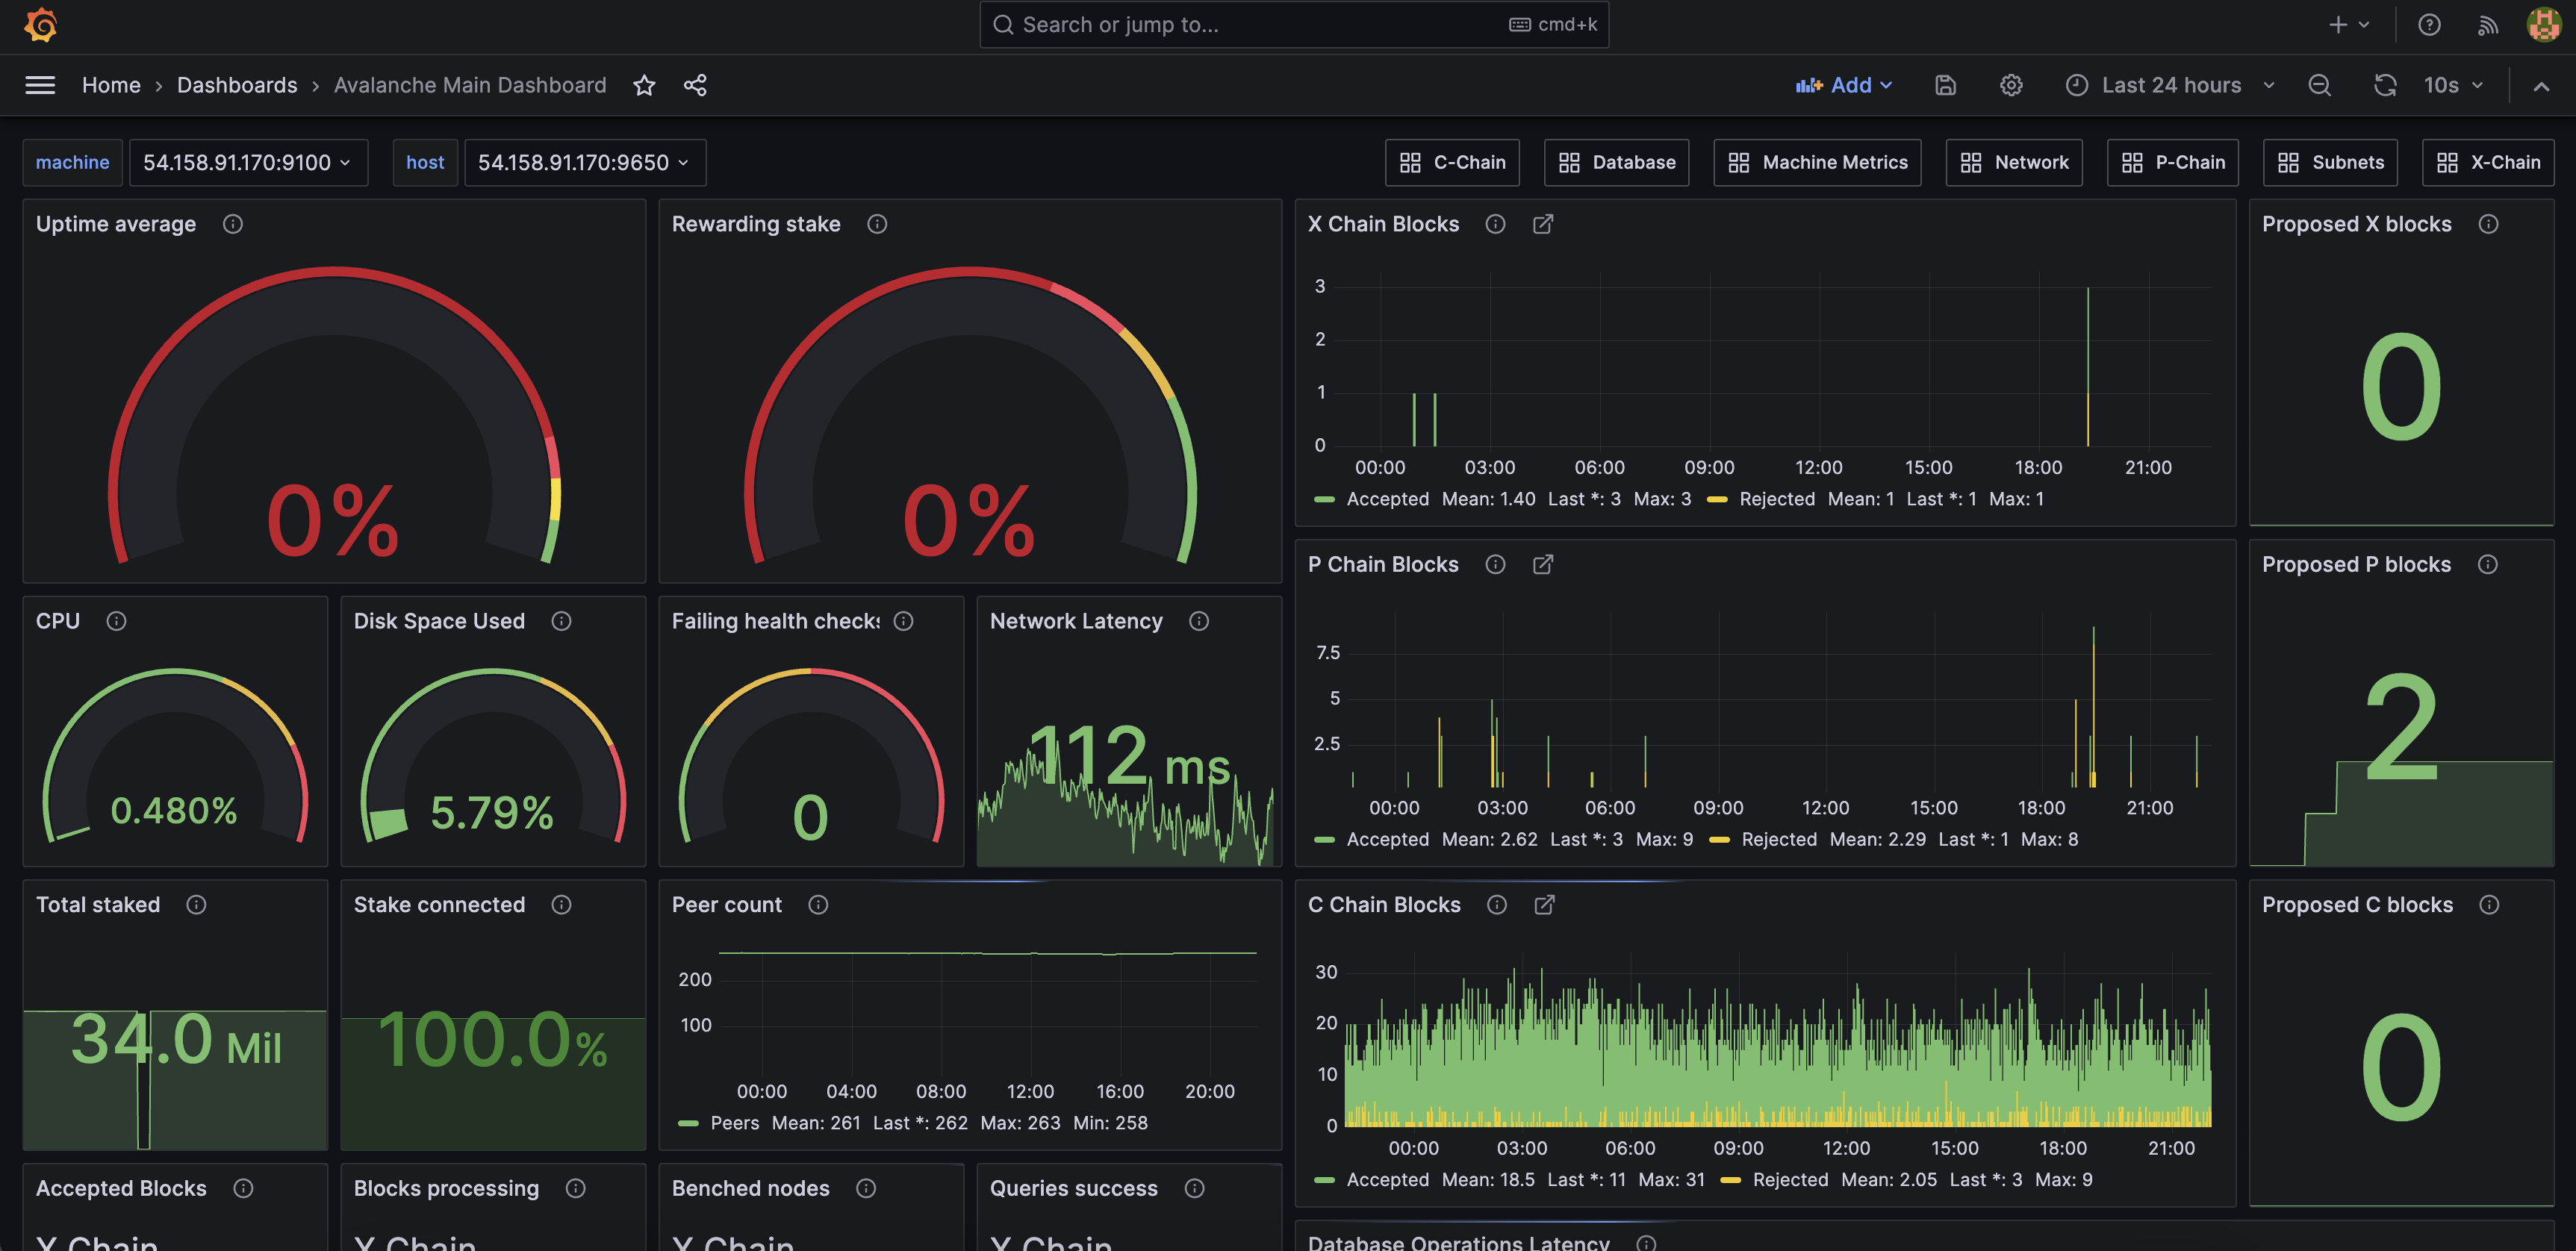
Setting up monitoring on a separate GCP instance enables you to have a unified Grafana dashboard for all nodes in a cluster, as seen below:
The separate monitoring GCP instance will have similar specs to the default GCP cloud server, except for its storage, which will be set to 50 GB.
Please note that setting up monitoring on a separate GCP instance will incur additional cost of setting up an additional GCP cloud server.
The command will then ask which Avalanche Go version you would like to install in the cloud server.
You can choose default (which will install the latest version) or you can enter the name of a
Subnet created with CLI that you plan to be validated by this node (we will get the latest version
that is compatible with the deployed Subnet's RPC version).
Once the command has successfully completed, Avalanche-CLI outputs all the created cloud server node IDs as well as the public IP that each node can be reached at.
Avalanche-CLI also outputs the command that you can use to ssh into each cloud server node.
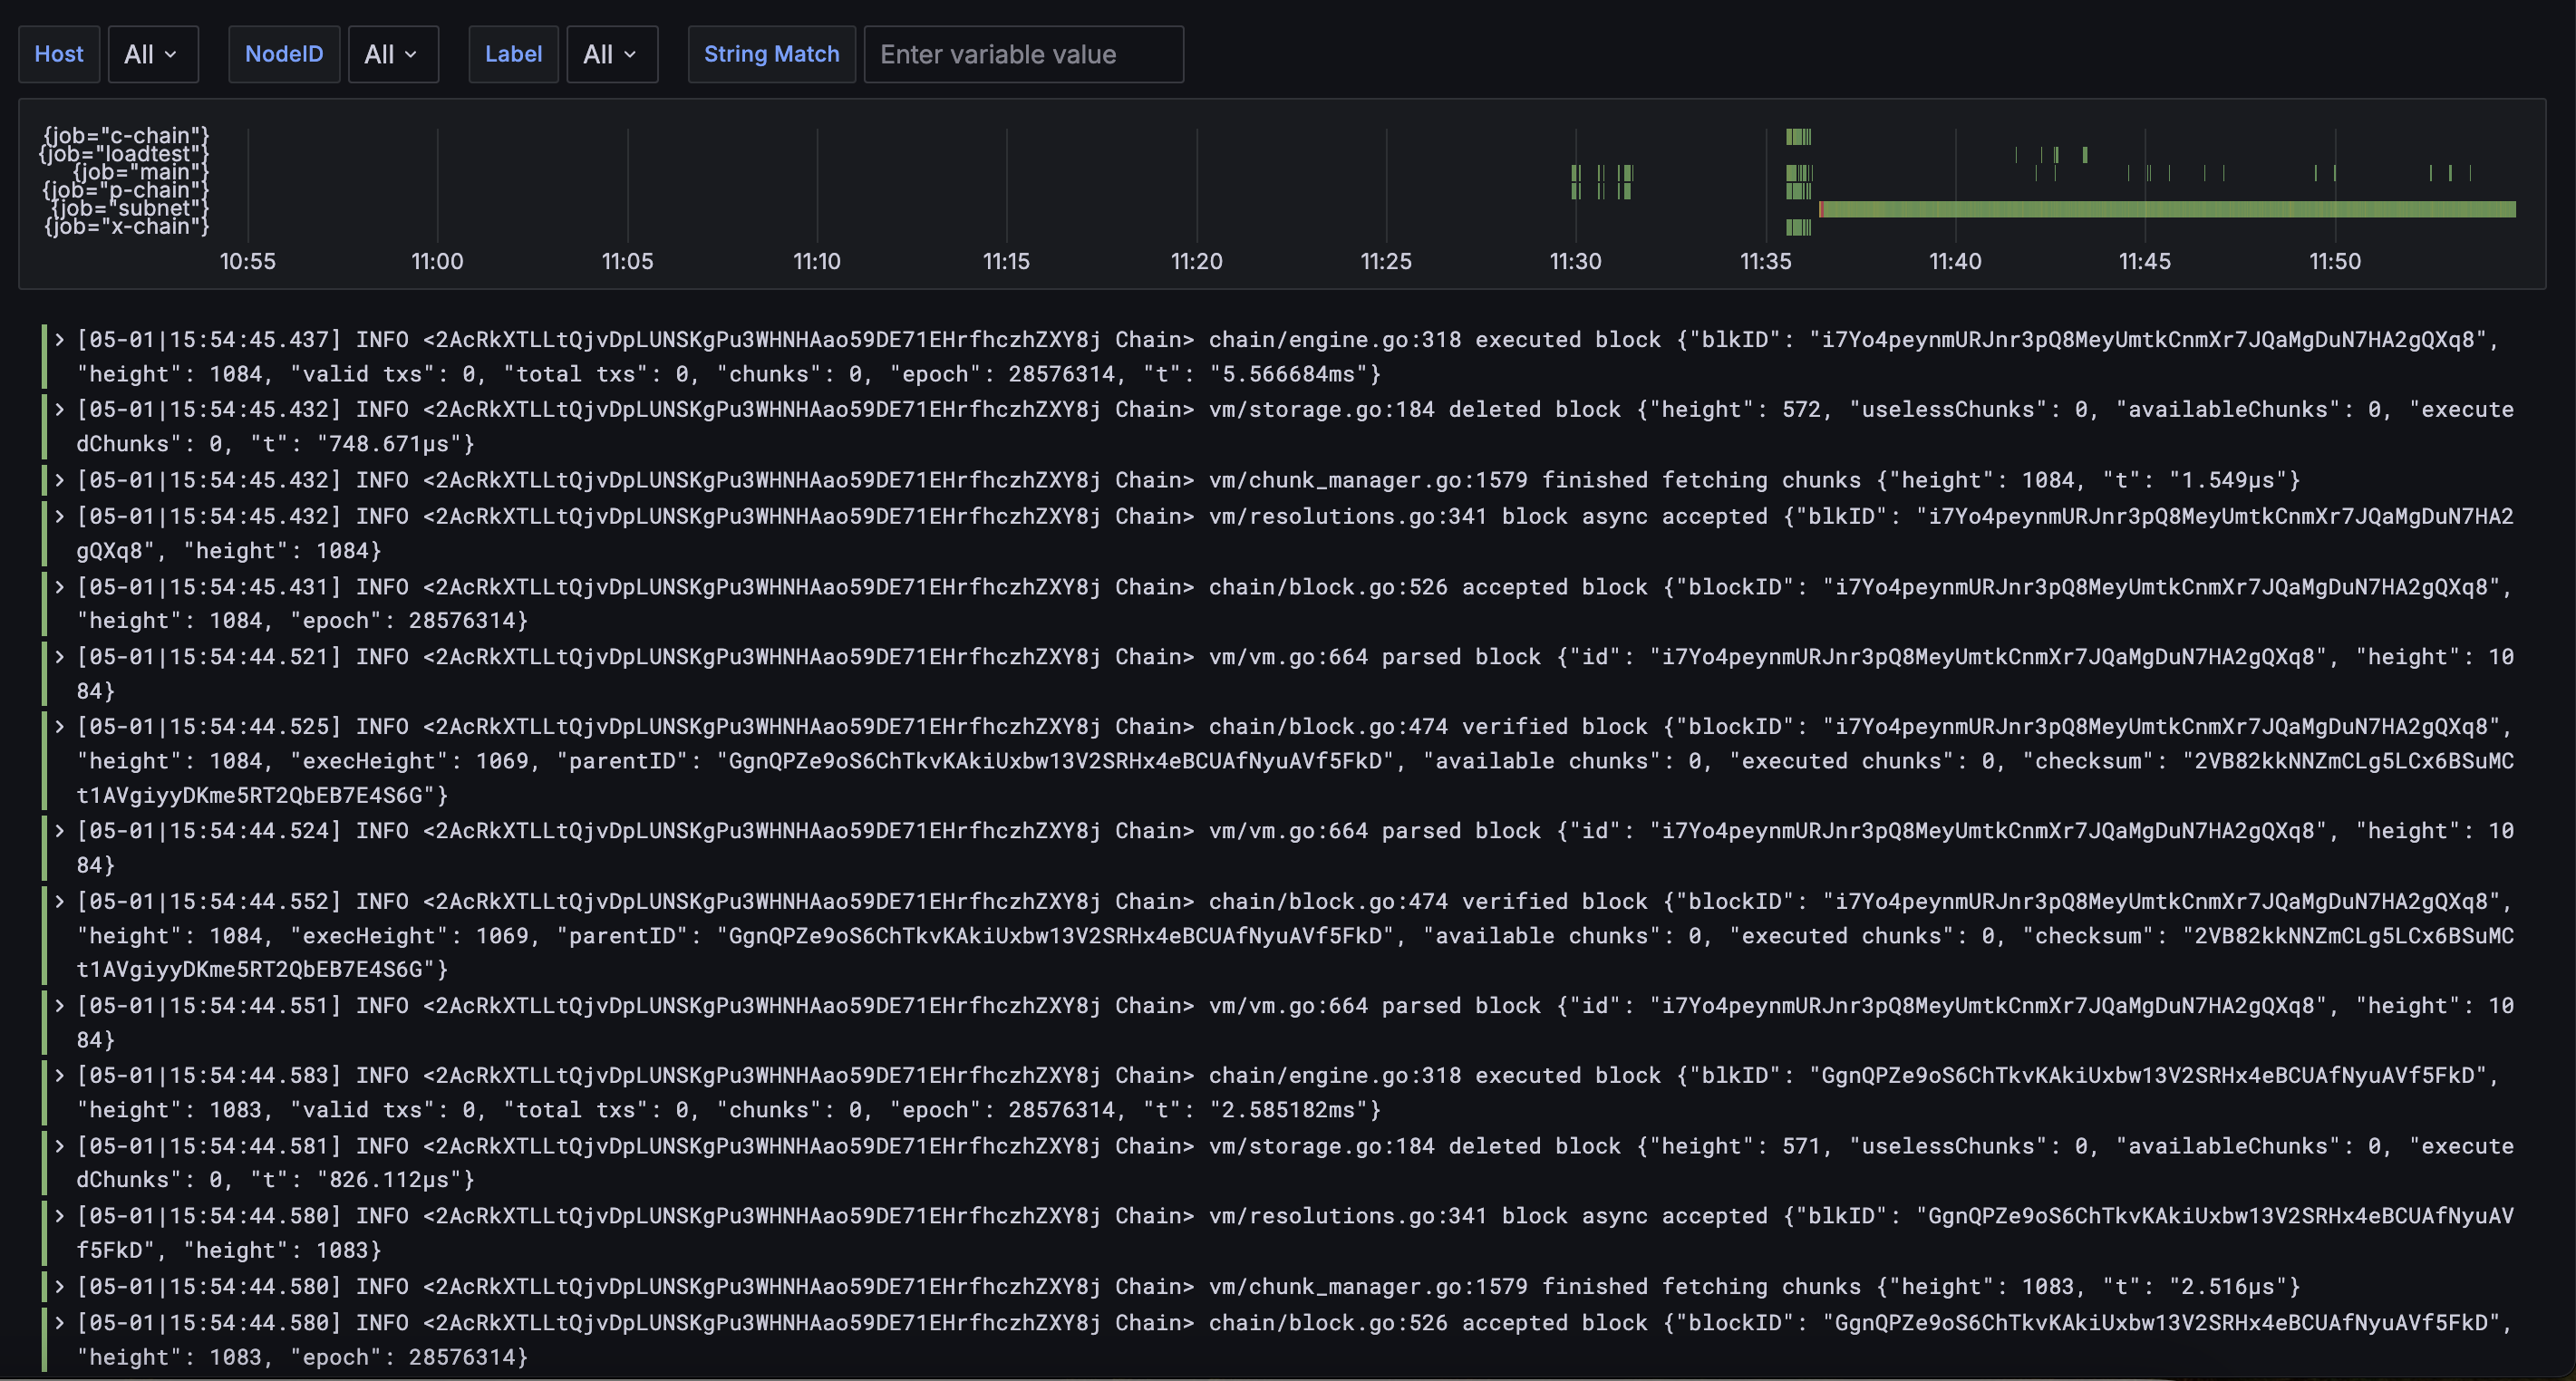
Finally, if monitoring is set up, Avalanche-CLI will also output the Grafana link where the centralized dashboards and logs can be accessed.
By the end of successful run of create command, Avalanche-CLI would have:
- Installed Avalanche Go in cloud server
- Installed Avalanche CLI in cloud server
- Downloaded the
.pemprivate key file to access the cloud server into your local.sshdirectory. Back up this private key file as you will not be able to ssh into the cloud server node without it (unlessssh-agentis used). - Downloaded
staker.crtandstaker.keyfiles to your local.avalanche-clidirectory so that you can back up your node. More info about node backup can be found here - Started the process of bootstrapping your new Avalanche node to the Primary Network
Please note that Avalanche CLI can be configured to use ssh-agent for ssh access to cloud server. Yubikey hardware can be also used to store private ssh
key. Please use official Yubikey documentation, for example [https://developers.yubico.com/PGP/SSH_authentication/] for more details.
Check Bootstrap Status
Ignore for Devnet
Please note that you will have to wait until the nodes have finished bootstrapping before the
nodes can be Primary Network or Subnet Validators. To check whether all the nodes in a cluster
have finished bootstrapping, run avalanche node status <clusterName>.
Was this page helpful?