Build Your First Subnet
This tutorial walks you through the process of using Avalanche-CLI to create a Subnet, deploy it to a local network, and connect to it with Core wallet.
The first step of learning Subnet development is learning to use Avalanche-CLI.
Installation
The fastest way to install the latest Avalanche-CLI binary is by running the install script:
curl -sSfL https://raw.githubusercontent.com/ava-labs/avalanche-cli/main/scripts/install.sh | sh -s
The binary installs inside the ~/bin directory. If the directory doesn't exist,
it will be created.
You can run all of the commands in this tutorial by calling ~/bin/avalanche.
You can also add the command to your system path by running
export PATH=~/bin:$PATH
If you add it to your path, you should be able to call the program anywhere with just avalanche.
To add it to your path permanently, add an export command to your shell initialization script
(ex: .bashrc or .zshrc).
For more detailed installation instructions, see Avalanche-CLI Installation
Create Your Subnet Configuration
This tutorials teaches you how to create an Ethereum Virtual Machine (EVM) based Subnet. To do so, you use Subnet-EVM, Avalanche's Subnet fork of the EVM. It supports airdrops, custom fee tokens, configurable gas parameters, and multiple stateful precompiles. To learn more, take a look at Subnet-EVM. The goal of your first command is to create a Subnet-EVM configuration.
The Subnet command suite provides a collection of tools for developing and deploying Subnets.
The Subnet Creation Wizard walks you through the process of creating your Subnet. To get started,
first pick a name for your Subnet. This tutorial uses mySubnet, but feel free to substitute that
with any name you like. Once you've picked your name, run
avalanche subnet create mySubnet
The following sections walk through each question in the wizard.
Choose Your VM
Select SubnetEVM.
Enter Your Subnet's ChainID
Choose a positive integer for your EVM-style ChainID.
In production environments, this ChainID needs to be unique and not shared with any other chain. You can visit chainlist to verify that your selection is unique. Because this is a development Subnet, feel free to pick any number. Stay away from well-known ChainIDs such as 1 (Ethereum) or 43114 (Avalanche C-Chain) as those may cause issues with other tools.
Token Symbol
Enter a string to name your Subnet's native token. The token symbol doesn't necessarily need to be unique. Example token symbols are AVAX, JOE, and BTC.
Subnet-EVM Version
Select Use latest version.
Gas Fee Configuration
This question determines how to set gas fees on your Subnet.
Select Low disk use / Low Throughput 1.5 mil gas/s (C-Chain's setting).
Airdrop
Select Airdrop 1 million tokens to the default address (do not use in production).
This address's private key is well-known, so DO NOT send any production funds to it. Attackers would likely drain the funds instantly.
When you are ready to start more mature testing, select Customize your airdrop to distribute
funds to additional addresses.
Precompiles
Precompiles are Avalanche's way of customizing the behavior of your Subnet. They're strictly an
advanced feature, so you can safely select No for now.
Wrapping Up
If all worked successfully, the command prints Successfully created subnet configuration.
You've successfully created your first Subnet configuration. Now it's time to deploy it.
Deploying Subnets Locally
To deploy your Subnet, run
avalanche subnet deploy mySubnet
Make sure to substitute the name of your Subnet if you used a different one than mySubnet.
Next, select Local Network.
This command boots a five node Avalanche network on your machine. It needs to download the latest versions of AvalancheGo and Subnet-EVM. The command may take a couple minutes to run.
Note: If you run bash on your shell and are running Avalanche-CLI on ARM64 on Mac, you will
require Rosetta 2 to be able to deploy Subnets locally. You can download Rosetta 2 using
softwareupdate --install-rosetta .
If all works as expected, the command output should look something like this:
> avalanche subnet deploy mySubnet
✔ Local Network
Deploying [mySubnet] to Local Network
Installing subnet-evm-v0.4.3...
subnet-evm-v0.4.3 installation successful
Backend controller started, pid: 93928, output at: /Users/subnet-developer/.avalanche-cli/runs/server_20221122_173138/avalanche-cli-backend
Installing avalanchego-v1.9.3...
avalanchego-v1.9.3 installation successful
VMs ready.
Starting network...
..................
Blockchain has been deployed. Wait until network acknowledges...
......
Network ready to use. Local network node endpoints:
+-------+----------+------------------------------------------------------------------------------------+
| NODE | VM | URL |
+-------+----------+------------------------------------------------------------------------------------+
| node2 | mySubnet | http://127.0.0.1:9652/ext/bc/SPqou41AALqxDquEycNYuTJmRvZYbfoV9DYApDJVXKXuwVFPz/rpc |
+-------+----------+------------------------------------------------------------------------------------+
| node3 | mySubnet | http://127.0.0.1:9654/ext/bc/SPqou41AALqxDquEycNYuTJmRvZYbfoV9DYApDJVXKXuwVFPz/rpc |
+-------+----------+------------------------------------------------------------------------------------+
| node4 | mySubnet | http://127.0.0.1:9656/ext/bc/SPqou41AALqxDquEycNYuTJmRvZYbfoV9DYApDJVXKXuwVFPz/rpc |
+-------+----------+------------------------------------------------------------------------------------+
| node5 | mySubnet | http://127.0.0.1:9658/ext/bc/SPqou41AALqxDquEycNYuTJmRvZYbfoV9DYApDJVXKXuwVFPz/rpc |
+-------+----------+------------------------------------------------------------------------------------+
| node1 | mySubnet | http://127.0.0.1:9650/ext/bc/SPqou41AALqxDquEycNYuTJmRvZYbfoV9DYApDJVXKXuwVFPz/rpc |
+-------+----------+------------------------------------------------------------------------------------+
Browser Extension connection details (any node URL from above works):
RPC URL: http://127.0.0.1:9650/ext/bc/SPqou41AALqxDquEycNYuTJmRvZYbfoV9DYApDJVXKXuwVFPz/rpc
Funded address: 0x8db97C7cEcE249c2b98bDC0226Cc4C2A57BF52FC with 1000000 (10^18) - private key: 56289e99c94b6912bfc12adc093c9b51124f0dc54ac7a766b2bc5ccf558d8027
Network name: mySubnet
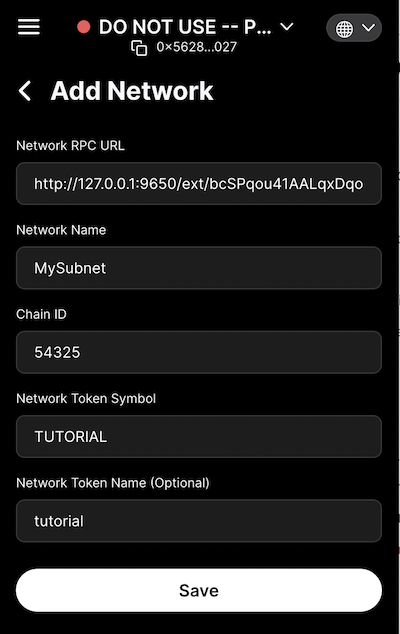
Chain ID: 54325
Currency Symbol: TUTORIAL
You can use the deployment details to connect to and interact with your Subnet. Now it's time to interact with it.
Interacting with Your Subnet
You can use the value provided by Browser Extension connection details to connect to your Subnet
with Core, MetaMask, or any other wallet.
To allow API calls from other machines, use --http-host=0.0.0.0 in the config.
Browser Extension connection details (any node URL from above works):
RPC URL:          http://127.0.0.1:9650/ext/bc/SPqou41AALqxDquEycNYuTJmRvZYbfoV9DYApDJVXKXuwVFPz/rpc
Funded address:   0x8db97C7cEcE249c2b98bDC0226Cc4C2A57BF52FC with 1000000 (10^18) - private key: 56289e99c94b6912bfc12adc093c9b51124f0dc54ac7a766b2bc5ccf558d8027
Network name:     mySubnet
Chain ID:         54325
Currency Symbol:  TUTORIAL
This tutorial uses Core.
Importing the Test Private Key
This address derives from a well-known private key. Anyone can steal funds sent to this address. Only use it on development networks that only you have access to. If you send production funds to this address, attackers may steal them instantly.
First, you need to import your airdrop private key into Core.
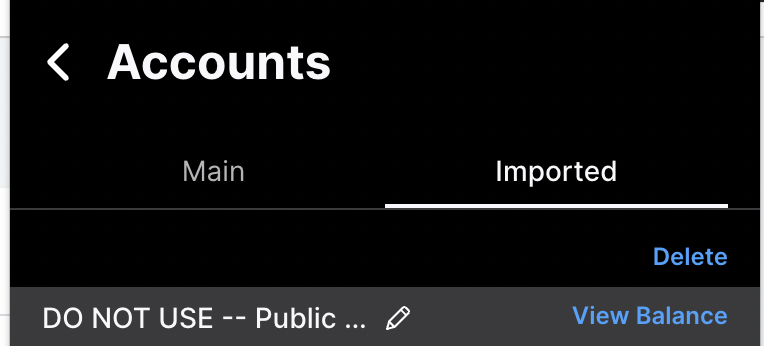
In the Accounts screen, select the Imported tab. Click on Import private key.

Here, enter the private key. Import the well-known private key 0x56289e99c94b6912bfc12adc093c9b51124f0dc54ac7a766b2bc5ccf558d8027.

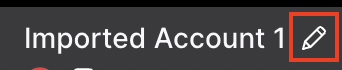
Next, rename the Core account to prevent confusion. On the Imported tab, click on the pen icon
next to your account. Rename the account DO NOT USE -- Public test key to prevent confusion with any
personal wallets.
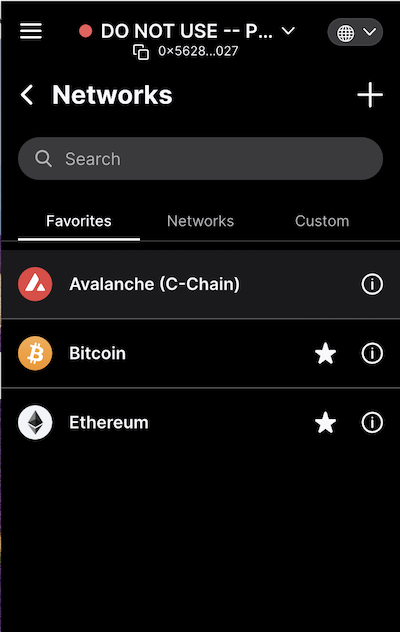
Connect to the Subnet
Next, you need to add your Subnet to Core's networks.
In the Core Extension click, See All Networks and then select the
+ icon in the top right.
Enter your Subnet's details, found in the output of your avalanche subnet deploy
command, into the form and click Save.
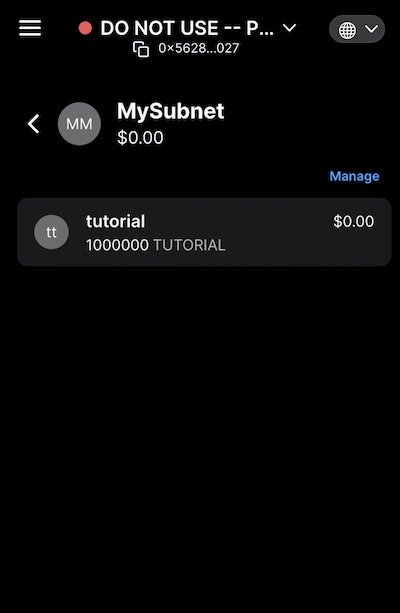
If all worked as expected, your balance should read 1 million tokens. Your Subnet is ready for action. You might want to try to Deploy a Smart Contract on Your Subnet-EVM Using Remix and Core.
Next Steps
Congrats Subnetooooor, you just deployed your first Subnet!
After you feel comfortable with this deployment flow, try deploying smart contracts on your chain with Remix, Hardhat, or Foundry. You can also experiment with customizing your Subnet by addingprecompiles or adjusting the airdrop.
Once you've developed a stable Subnet you like, see Create an EVM Subnet on Fuji Testnet to take your Subnet one step closer to production.
Good Subnetting!
FAQ
How is the Subnet ID determined upon creation?
The Subnet ID is the hash of the transaction that created the Subnet.
Was this page helpful?